Quick start with TDD in JavaScript using Jest

JavaScript is one of the most versatile programming languages I know, however, I had a constant problem with the testing. Since I run into TDD, I was looking for something that allows me to build my solutions using this approach. When I had been creating a small project in React, I accidentally discovered Jest.
It surprised me because it hadn’t required any extra configuration. I thought that the configuration was built-in into the create-react-app tool. It turns out that zero-configuration is one of the philosophies behind this tool. I decided to try using it outside the React application. Since this moment, this is a standard tool for my unit tests for the JavaScript.
Let me show how easy work with Jest is.
How to start testing with Jest
Add Jest to the project
First, we need to install Jest as a dependency. We can also install it globally but I prefer to treat it like a normal dependency within the project. The easiest way to do it is to use yarn or npm.
yarn add --dev jest
The next step is adding a starting script to the package.json file to run the test using locally installed instance.
{
  "scripts": {
    "test": "jest"
  }
}
Run tests in the watch mode
If we’re working in the project using git, Jest uses the data from the repository to identify and runs tests for modified files. It’s necessary if we want to run it in the watch mode.
yarn test --watch
Otherwise, if we’re not using any version control system, Jest isn’t able to identify changed files. We can still watch for changes in every file using the —watchAll flag. It’s OK for the small number of files.
yarn test --watchAll
Of course, we can still narrow the watching scope to a specific name or path to file, but let’s keep things simple for the beginning. For more information, take a look at the documentation.
Configure Jest to work with Babel
I cannot imagine work without the ES6 syntax in the JavaScript. It introduced lots of useful features which make JS easier to use. To support Babel, we need to add a few more dependencies.
yarn add --dev babel-jest babel-core babel-preset-env regenerator-runtime
According to the documentation, regenerator-runtime isn’t needed if you use yarn or npm (v3 or v4).
You can also have to adjust the .babelrc file:
{
  "presets": ["env"]
}
Write test
Now, we can switch to the writing the test. I prefer simple solutions, so I started with creating a test file in the same directory as the tested code. Let’s consider the function which normalizes an array of numbers.
// Normalizer.js
import max from 'lodash/max';
import min from 'lodash/min';

const scaler = (dataset, _min = null, _max = null) => {
    _min = _min || min(dataset);
    _max = _max || max(dataset);

    if (dataset.length === 1) {
        _min = 0;
    }

    return dataset.map(normalize(_min, _max));
};

const normalize = (min, max) => (val) => (
    (val - min) / (max - min)
);

export default scaler;
To start, we have to import the function in the scope of the test and check outputs for given inputs. Of course, we consider only unit tests for now.
// Normalizer.test.js
import scaler from './Normalizer';
it('should return an empty result for empty dataset', () => {
expect(scaler([])).toHaveLength(0);
});
it('should return the same dataset for one identity element', () => {
expect(scaler([1])).toMatchObject([1]);
});
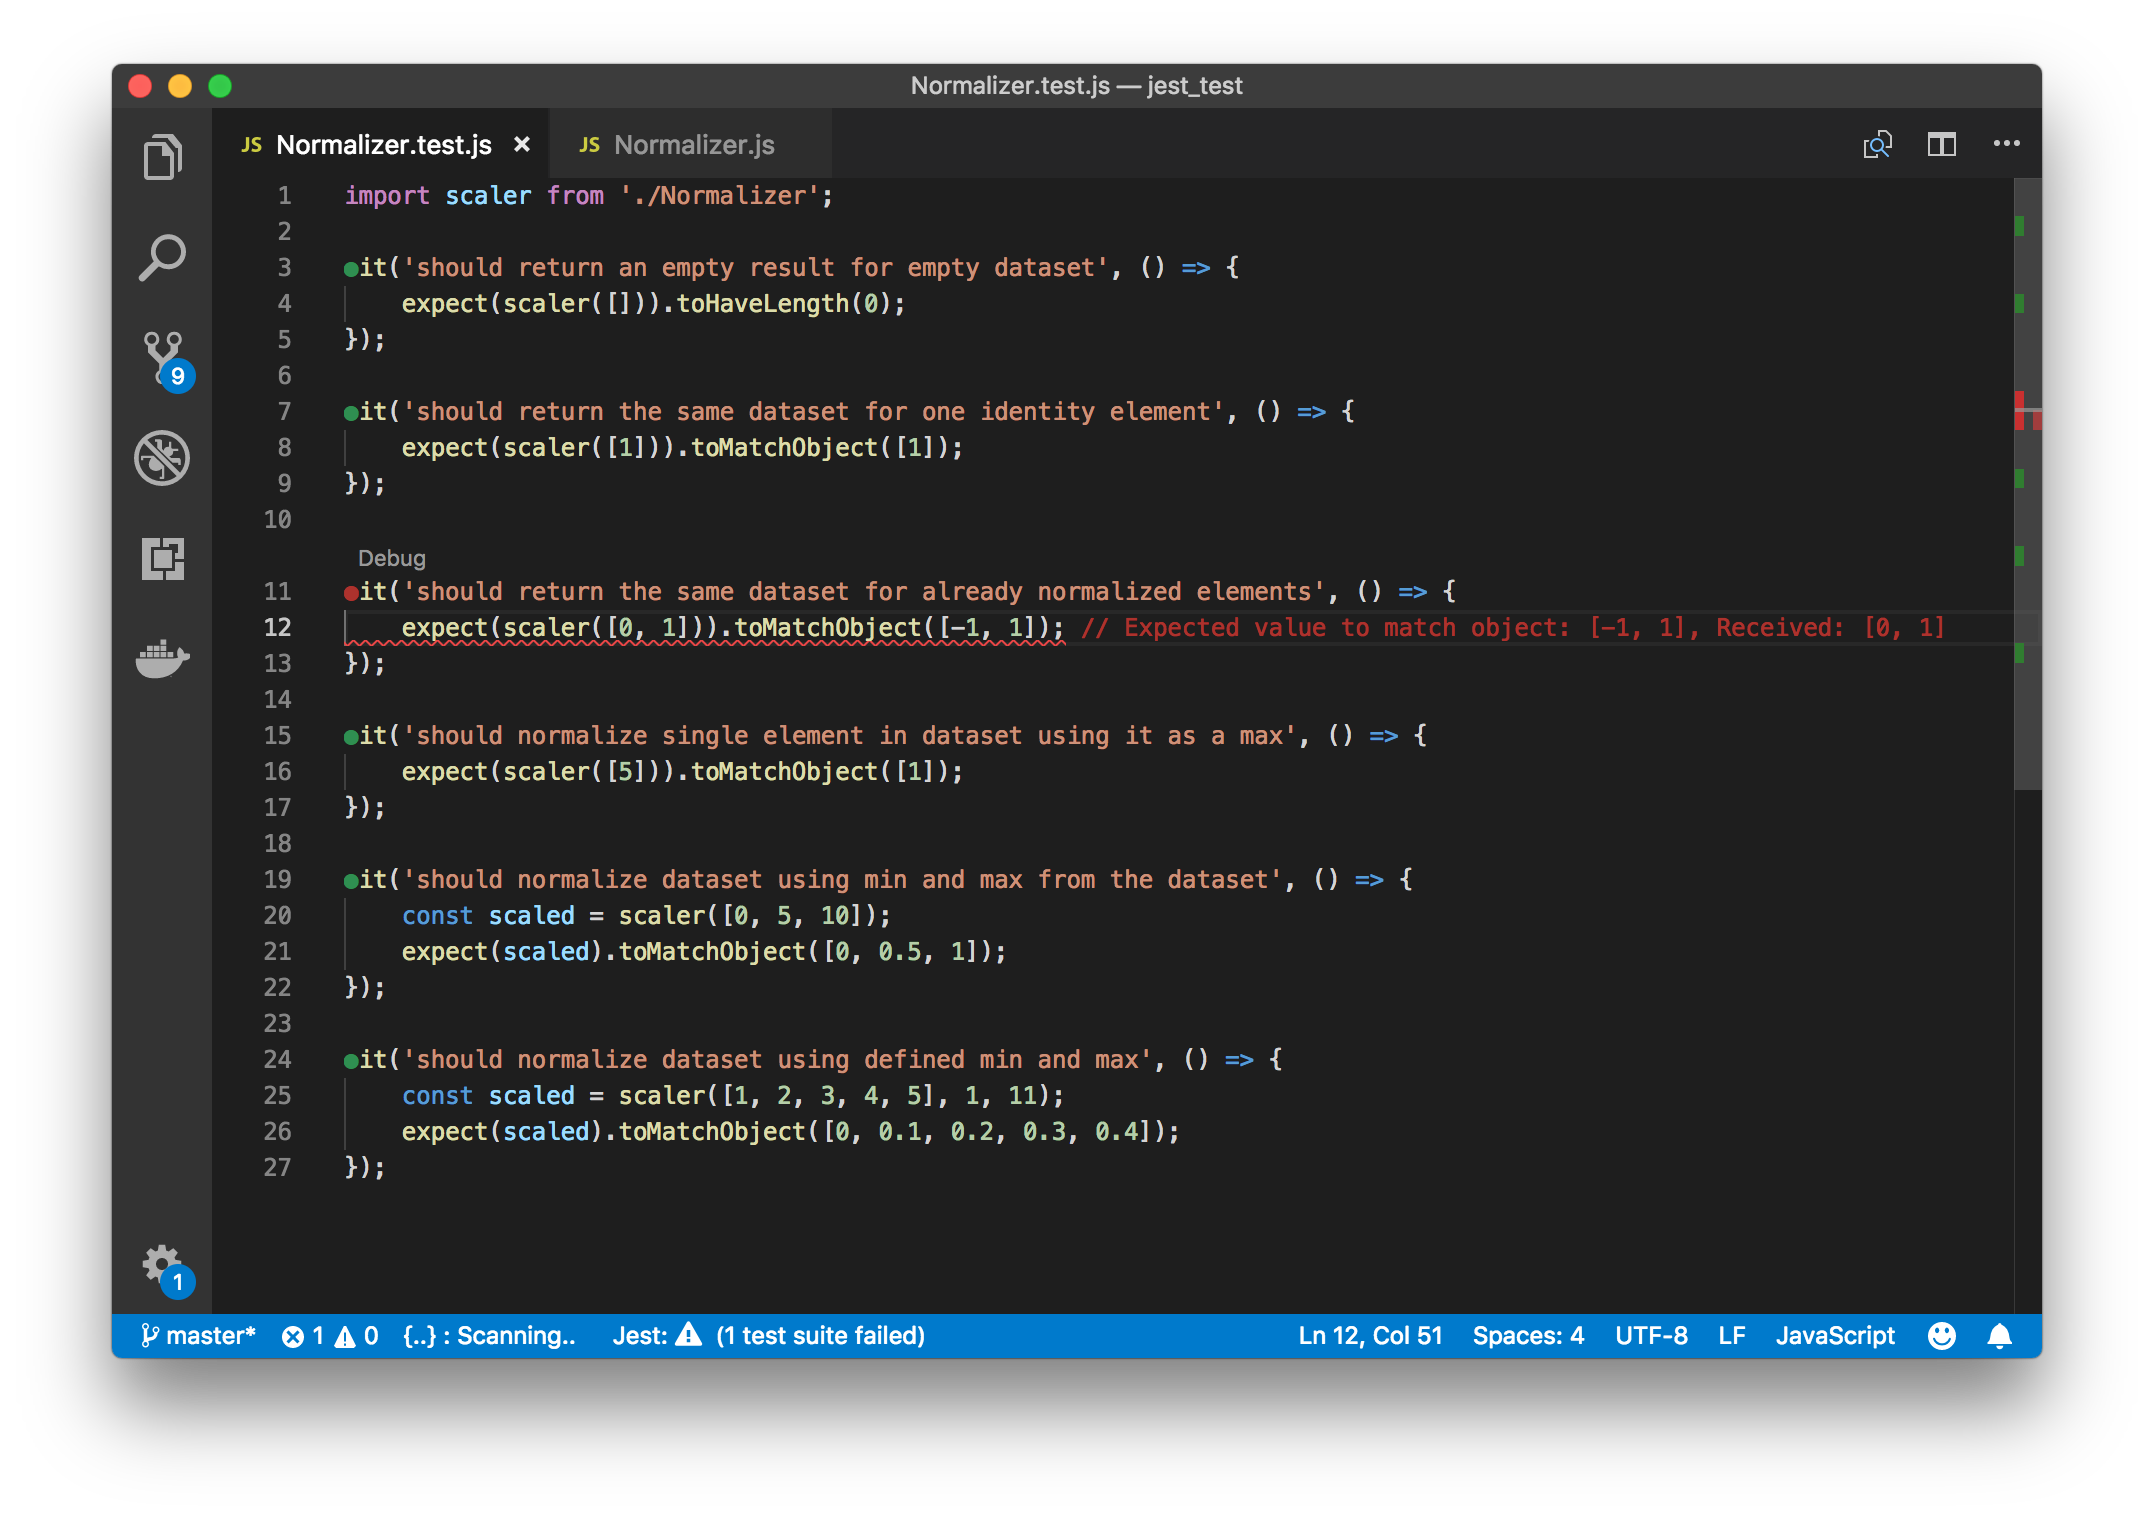
it('should return the same dataset for already normalized elements', () => {
expect(scaler([0, 1])).toMatchObject([0, 1]);
});
it('should normalize single element in dataset using it as a max', () => {
expect(scaler([5])).toMatchObject([1]);
});
it('should normalize dataset using min and max from the dataset', () => {
const scaled = scaler([0, 5, 10]);
expect(scaled).toMatchObject([0, 0.5, 1]);
});
it('should normalize dataset using defined min and max', () => {
const scaled = scaler([1, 2, 3, 4, 5], 1, 11);
expect(scaled).toMatchObject([0, 0.1, 0.2, 0.3, 0.4]);
});
Thanks to the watching mode, we can receive the feedback after each change in both the test and the code. That’s great when you work using a TDD approach. Moreover, if you using an editor like Visual Studio Code or Atom, there are great extensions providing useful visual feedback directly in the editor (see resources).
Summary
This presented use-case is small, however, I often need a develop some small functionalities to confirm my initial idea. That’s why I need a tool, that supports me with my work instead of overwhelming me by its own configuration. By using Jest, I can focus on things I want to do instead of doing things I have to do.
I think It’s always worth to try new development tools. Sometimes a little change may have a significant difference in future work. But don’t take things for granted and test by our own. Maybe in your case, a different tool is much better? Let me know in comments.
Resources
- https://jestjs.io/en/ – Jest documentation
- https://babeljs.io/docs/en/ – Babel documentation
- https://jestjs.io/docs/en/getting-started#using-babel – Using Jest with Babel
- https://marketplace.visualstudio.com/items?itemName=Orta.vscode-jest – Jest runner for VSCode
- https://atom.io/packages/tester-jest – Jest runner for Atom
Featured photo by Chris Liverani on Unsplash.