Setup end-to-end encrypted cloud drive using rclone
Last time I’ve experimented with applying various encryption solutions to the public cloud storage such as Google Drive or OneDrive. They are relatively cheap online storage. However, I don’t consider them the best place for all my files, especially sensitive ones. To make them more useful to me, I was looking for an end-to-end encryption mechanism I could use with clouds in tandem, and I finally discovered rclone.
In this article, I’d like to show you my approach to use rclone as the way to have an end-to-end encrypted cloud drive.
It’s not my first endeavour with cloud storage and encryption. Some time ago, I wrote about syncing files with cryptomator vault. Cryptomator is also an excellent tool, but for the current case, I found rclone to be more useful. Maybe I’ll write about it in another article.
‼️ IMPORTANT NOTE ‼️
This article demonstrates how to set up an encrypted cloud drive to protect your data and privacy from your cloud storage provider. I do not recommend and I do not encourage to treat it as a way to hide and store illegal files.
Why even bother?
Almost every storage provider encrypts your data (Google, Dropbox, OneDrive) or gives you control over encryption (S3). Thanks to them, your data is encrypted in transit and at rest. It means, no breach on your provider’s server will reveal your files. Your account works like a key – only you and your provider have access to the unencrypted data (because the service also has access to encryption key).
On the other hand, your credentials are the only thing that lies between the public Internet and your data. Your data is safe as long as your login and password are secure. Turning on two-factor authentication improves the protection even more, but still, there is only an authentication procedure that is under someone’s else control.
When something is end-to-end encrypted, no one but you can view the data. It’s an entirely different level of protection and privacy – even the service where you store your files knows nothing about them because decryption takes place only on your devices. It comes with a cost – the fancy web interface where you can browse files, preview images and documents, or even edit them is no longer usable. The cloud is only a container for your encrypted data.

So, is it worth even bother? You have to answer it by yourself. Using end-to-end encryption on your own isn’t the most convenient way of utilizing cloud storage. You lose a lot of features it provides. Unfortunately, convenience rarely goes hand-in-hand with security, and, what is more relevant today – privacy. Remember that it’s not zero-one decision – you can still use encryption for your most sensitive data (what I highly recommend) and store other files as usual.
My motivations
I used to avoid keeping my data outside devices I’m able to control. I didn’t need to store things online because most of the time, I had my computer in my backpack, so my data was almost always available. But things changed. Mostly because:
- I started using two different computers,
- I slowly run out of space on my private MacBook,
- I began to treat my phone as my second computer, and I concluded that it would be convenient to access the same files I keep on my laptop,
- besides my backup, I wanted to have another place to store my files safely,
- I pay for Microsoft365, where I have 1TB of OneDrive included – it would be nice to take advantage of it.
I decided to take simple criteria:
- End-to-end encryption – data must be encrypted before leaving my device,
- Hard disk is not the limitation – I should be able to store gigabytes of data, even if the size of encrypted data exceeds the size of my hard drive,
- OS integration – it should be usable with Finder, e.g., using FUSE,
- Hassle-free – it should be a hassle-free, or at the very least, it should require as minimum maintenance-work as possible 1,
- Open-Source – it should be an open-source solution,
- Multi-platform – it should work on macOS, but shouldn’t be limited to this system – even better if it’s possible to access the data on the smartphone.
I didn’t perform exhaustive tests, but I found rclone to be the most suitable solution to build the encrypted cloud drive on top of it. I don’t answer if this solution is efficient, so if you’re looking for charts and numbers, it’s not the right place.
In this article, I’ll show you how to set up everything on macOS as I did. Still, almost everything (besides installation and launchd part) is also applicable to every other Linux system.
What is rclone?
Rclone promotes itself as a rsync for cloud storage. It lets you synchronize files between your computer and cloud storage providers or even between various cloud providers using your computer as a proxy.
File synchronization isn’t the only thing that rclone does. It also has a bunch of functionalities that allow you to expose and manipulate the data. For instance, you can mount a cloud drive directly to your operating system and use it as another drive. Or you can expose the content of the cloud drive by WebDAV, FTP, HTTP, or even DLNA protocol.
Preparation
Install rclone
First, you need to install a rclone. The simplest way is to do this is using brew.
$ brew install rclone
Configure remote storage
Rclone has built-in support for plenty of cloud storage providers. As I mentioned in [My Motivations section][#My Motivations], I use OneDrive, because I have 1TB online storage attached to the Microsoft365 subscription.
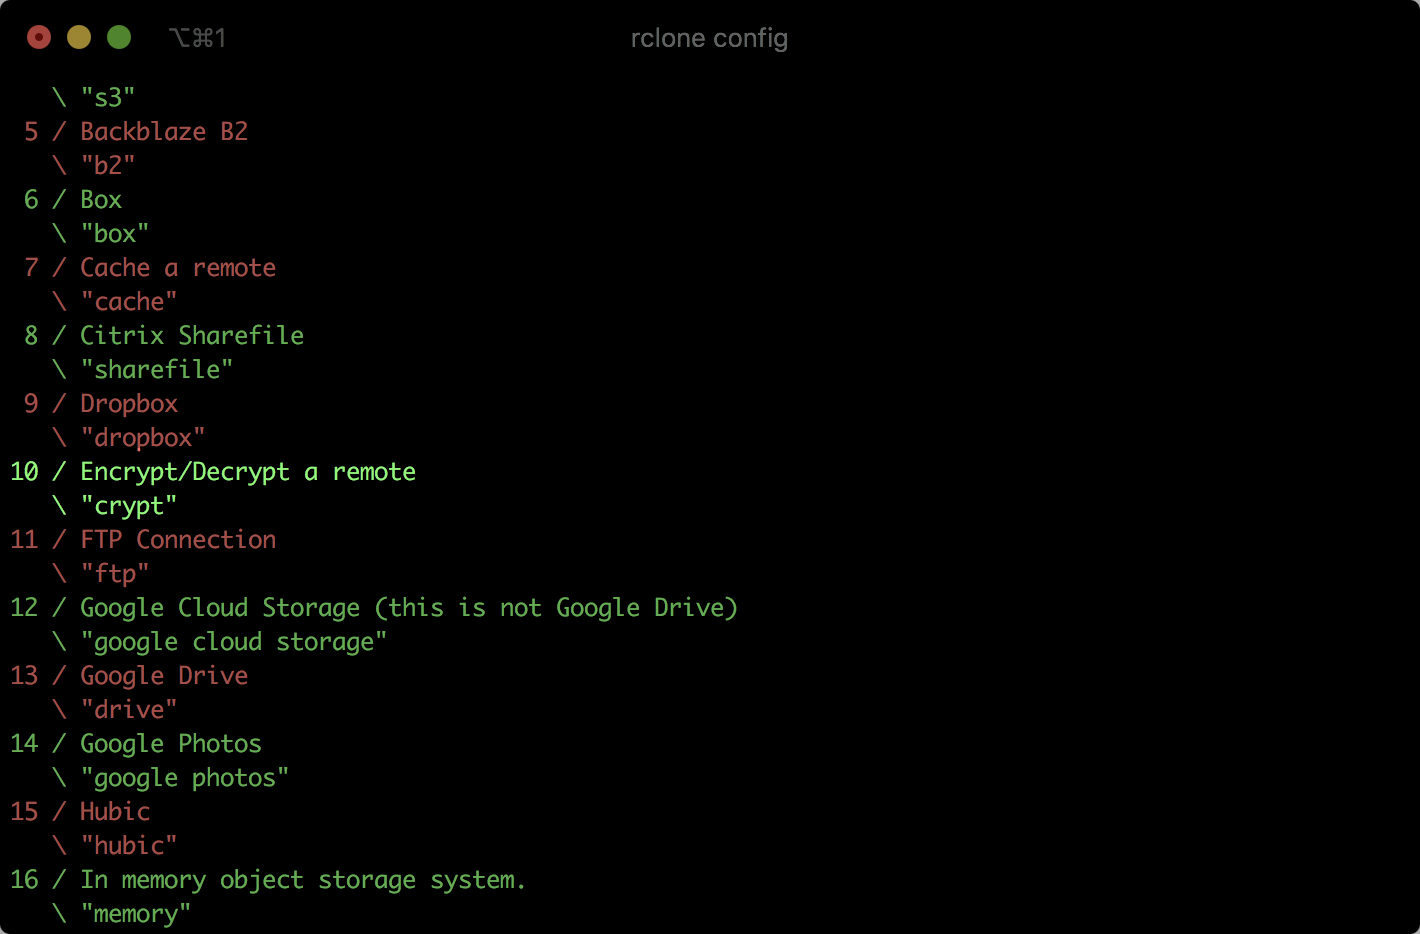
To change the configuration of rclone, run the following command.
$ rclone config
Then, create a new configuration by following instructions on the screen.
In my case, I created a new configuration named onedrive. I had to authorize rclone to use my OneDrive account. After that, I could view and manipulate my data using rclone commands.
To view the list of files in your account, use the below command (replace onedrive with your configuration name).
$ rclone lsd onedrive
You can also mount this storage into your filesystem, but on this stage, it doesn’t have any encryption attached so that it will be working more or less like any other client. The main difference is that the mounted files aren’t actually on your computer, so they don’t take up your hard drive space.
Add encryption layer
Rclone provides an encryption layer by remote called crypt. I called it layer because it’s a wrapper around another remote.
Since it’s technically possible to encrypt the whole backend, it’s not recommended practice because some providers keep special files or directories in the root directory. Also, it may collide with data you already keep on the cloud – rclone will try to decrypt them, showing you a bunch of messy files. Instead, create a dedicated directory for the encrypted data.
To add the encryption layer, go to the rclone configuration once again.
$ rclone config
Then, create a new configuration, but this time choose crypt from the list of available backends. I named it onedrive-crypt to highlight that I use a previously configured onedrive backend but with an additional encryption layer.
Rclone will ask about the remote to encrypt/decrypt. It’s time to select the place for encrypted files. I configured it to use onedrive:/encrypted, where encrypted will be a directory on onedrive remote.
After that, you have to provide additional details related to encryption, like
- file name encryption mode
- directory name encryption
- password and salt
Let’s talk briefly about them.
File name encryption mode
Using encryption, you can be sure that only people who know the key (probably only you) can view the content of the file. But what about its name? Does it even matter?
Name is one of the metadata. Metadata is just data about data. The name may disclose what could be in the file and plausible format, however, it’s only a guess. To avoid leaking this information, you can encrypt file names.
Rclone also has the option to obfuscate the file name. Although it hides the file name at first glance, it’s easy to recover the original title, so it’s more like an impediment to all sorts of scanners than real protection.
If you really want to hide a filename, you have to use filename encryption. It has at least two consequences.
- The encrypted name will be much longer than the original file name.
- Some cloud storage providers let you restore deleted files or previous versions of files. By encrypting the filenames, you may find it difficult to locate the proper file.
I use the standard encryption for file names.
Directory name encryption
Similarly to file names, you can encrypt the directory names. It’s worth considering turning on encryption because directory structure can say much more about your data than just files. It’s possible to evaluate what do you keep on the cloud by checking directory names.
Unfortunately, encryption goes with cost, and the price is the longer file path. If you want to have a complex directory structure inside your encrypted remote, e.g., your entire hard drive, you may hit the maximum file path length making your data unable to sync. When I write this article, OneDrive supports max length to 255 characters (see OneDrive-specific problems). Not so much, when encryption comes into the game. Fortunately, most providers support more characters in the file path than OneDrive.
Despite the limitation, I decided to encrypt directory names.
Password and salt
Each encryption consists of the algorithm and key. Since the algorithm is usually public, the key is the factor that secures your data. Rclone uses password and optional salt as the encryption key.
I recommend generating random strings both for encryption and salt. Rclone can do it for you. You’ll only need to choose a password strength. The recommendation is 128 bits, which is fine, but I use 256 bits – just in case.
Remember, put these passwords in a safe place, e.g., in a password manager.
Test configuration
My configuration looks as follows (I stripped the secrets):
[onedrive]
type = onedrive
token = *** JSON CONTAINING ACCESS TOKEN ***
drive_id *** DRIVE_ID ***
drive_type = personal

[onedrive-crypt]
type = crypt
remote = onedrive:/encrypted
filename_encryption = standard
directory_name_encryption = true
password = *** ENCRYPTED ***
password2 = *** ENCRYPTED ***
Once you finish the configuration part, you can check how your new encrypted storage works. You can mount it to the filesystem, move some files there and check how the content looks from, e.g., the web interface of your cloud storage.
Mount encrypted volume
Since it’s technically possible to mount storage system-wide, it requires a little different approach to storing configuration. In this example, I configure rclone, launchd agent, and mount path in the scope of my user profile.
Rclone offers a few different ways to browse files on your remote, but I found it convenient to browse it as another drive using a file explorer like Finder. I created a script to mount encrypted remote with some additional options.
Open new file, e.g. mount_encrypted_storage.sh and start writing your mount command. After some attempts, I’ll end up with something that satisfies me enough. You have to change some details like the volume name and the mount directory.
#!/bin/sh

/usr/local/bin/rclone mount \
    --rc \
    --transfers 8 \
    --volname TwoDrive \
    --allow-other \
    --log-level INFO \
    --buffer-size 32M \
    --vfs-cache-mode writes \
    --vfs-cache-max-size 16G \
    onedrive-crypt:/ /Users/szymon/.mount/onedrive_crypt
Make sure you have a directory where you can mount the encrypted remote.
$ mkdir -p ~/.mount/onedrive_crypt
Make this file executable and test if it’s working correctly.
$ sudo chmod +x mount-encrypted-storage.sh
$ ./mount-encrypted-storage
If there is no error in your terminal, you should be able to reach the new volume using Finder. It should appear on your computer, or you can enter it through the mounted directory.
Depending on --log-level option, rclone prints various information into stderr. Instead of using the --log-file parameter in the command, I’ll tell launchd to redirect all information pushed on this stream into the file.
Mount encrypted volume on startup
If something should happen automatically, the first thought is usually cron, whereas we have a set of more suitable tools such as systemd for Linux and launchd for macOS.
Since I use Mac, I’ll show you how I set it up using a launchd job.
I created a new plist file called pl.skrajewski.rclone.mount.onedrive_crypt.plist. This name follows the reverse domain name notation, and it can be used to categorize and sort jobs or other stuff. I mentioned about it in the article about configuring restic backup for macOS.
The definition looks as follows:
<?xml version="1.0" encoding="UTF-8"?>
<!DOCTYPE plist PUBLIC "-//Apple//DTD PLIST 1.0//EN" "http://www.apple.com/DTDs/PropertyList-1.0.dtd">
<plist version="1.0">
<dict>
  <key>Program</key>
  <string>/Users/szymon/scripts/mount_encrypted_storage.sh</string>

  <key>Label</key>
  <string>pl.skrajewski.rclone.mount.onedrive_crypt</string>

  <key>WorkingDirectory</key>
  <string>/Users/szymon</string>

  <key>RunAtLoad</key>
  <true/>

  <key>KeepAlive</key>
  <dict>
      <key>SuccessfulExit</key>
      <false/>
  </dict>

  <key>StandardErrorPath</key>
  <string>/Users/szymon/Library/Logs/local.rclone.mount.onedrive_crypt.log</string>
</dict>
</plist>
Since my rclone configuration exists only in the context of my user, I want to tell the launchd to treat it as a local agent. Daemons, in contrast to agents, are global and could be executed on behalf of either root or specified user.
To register definition as the local agent, I copied it into the ~/Library/LaunchAgents/ directory and loaded it using launchctl.
$ cp pl.skrajewski.rclone.mount.onedrive_crypt.plist ~/Library/LaunchAgents/
$ launchctl load ~/Library/LaunchAgents/pl.skrajewski.rclone.mount.onedrive_crypt.plist
Once the agent is loaded, it immediately starts the rclone process, and the new resource will be available in Finder.
Using your encrypted cloud
So, now you have the encrypted cloud drive. Thanks to FUSE, you can use it as any other storage attached to your computer. However, you should know how it works and how to use it to avoid running yourself in trouble.
Reliability of filesystem
First of all, the filesystem needs to be reliable. Mounting the encrypted drive using rclone and FUSE adds another abstraction layer to mimic the filesystem – every action in this space evokes a proper command in the rclone process. Sometimes it doesn’t work correctly, especially during dealing with large files. Finder isn’t aware that it works with remote storage, and it doesn’t have any mechanism to recover from unexpected network errors or timeouts.
For day to day usage, I’ve had no problems so far. I follow simple rules:
- I use mounted volume mostly for accessing the data,
- but avoid using quick look on large files, e.g., movies,
- I don’t work directly on mounted volume2,
- I upload large files using the command line.
Initial synchronization
Since your drive is empty, I suppose that the very first thing will be to upload some files. You can start small from a few megabytes, but If you’re going to upload a massive set of data, e.g., your entire hard drive, I recommend using CLI.
I started by creating a simple script that runs synchronization for selected directories.
#!/bin/sh

OPTS="--rc --transfers 8 --progress"

rclone sync $HOME/Movies onedrive-crypt:/Movies $OPTS
rclone sync $HOME/Archive onedrive-crypt:/Archove $OPTS
rclone sync $HOME/Music onedrive-crypt:/Music $OPTS
rclone sync $HOME/Pictures onedrive-crypt:/Pictures $OPTS
rclone sync $HOME/Utilities onedrive-crypt:/Utilities $OPTS
rclone sync $HOME/Photos onedrive-crypt:/Photos $OPTS
It doesn’t look pretty and isn’t so optimal, but for initial upload, it’s OK. Thanks to the --rc option, you can control the running rclone process. It could be useful if you need to limit the bandwidth when synchronization is underway.
Save the file as, e.g., init-sync.sh and make it executable. I recommend running it using a utility called caffeinate, which prevents the system from idle sleeping. Before you do that, you need to unmount your encrypted drive.
$ chmod +x init-sync.sh
$ launchctl unload ~/Library/LaunchAgents/pl.skrajewski.rclone.mount.onedrive_crypt.plist
$ caffeinate -i init-sync.sh
If you need to limit the bandwidth during synchronization, use a proper rc command:
$ rclone rc core/bwlimit rate=512K # limit the bandwidth to 512KB/s
$ rclone rc core/bwlimit rate=off  # disable bandwidth limitation
After finished synchronization, you can mount your encrypted remote again.
$ launchctl load ~/Library/LaunchAgents/pl.skrajewski.rclone.mount.onedrive_crypt.plist
OneDrive-specific problems
OneDrive isn’t the best choice if you want to sync your entire hard drive regularly. Below I write three potential problems you may encounter during your attempts with this cloud storage.
File Name Too Long
OneDrive has a significant limitation when it comes to max file length, which is a limitation on the entire path to file, starting with the root of the OneDrive directory. A lot of people complain about this issue.
To check the actual limitation, you can run the below command.
$ rclone info --check-control=false --check-length=true --check-normalization=false --check-streaming=false onedrive-crypt:
After a couple of seconds, the answer will be print to stdout:
// onedrive-crypt
maxFileLength = 159
The rclone documentation also point to this issue:
Cloud storage systems have various limits on file name length and total path length which you are more likely to hit using “Standard” file name encryption. If you keep your file names to below 156 characters in length then you should be OK on all providers.
The need to empty trash manually
According to rclone documentation, OneDrive doesn’t provide a method to delete files permanently.
Any files you delete with rclone will end up in the trash. Microsoft doesn’t provide an API to permanently delete files, nor to empty the trash, so you will have to do that with one of Microsoft’s apps or via the OneDrive website.
It’s worth knowing about this limitation if you’re going to sync a lot of files, and you have a lot of file removals.
Ransomware detection mechanism
OneDrive provides a ransomare detection mechanism and notifies you if you’re a victim of an attack. However, from Microsoft’s perspective, upload a large set of encrypted files looks suspicious enough to classify it as ransomware, so you’ll end up with notification about this false-positive case from time to time. Unfortunately, OneDrive doesn’t allow turning off this functionality.
Summary
Let’s do a quick recap to check if we meet the criteria:
- End-to-end encryption – it was the main goal,
- Hard disk is not the limitation – data are stored online, the hard drive works as cache,
- OS Integration– with limited support, but it’s possible,
- Hassle-free – could be subjective, but for me, it’s manageable,
- Multi-platform – rclone works on various operating systems. For mobile access, I use a WebDAV resource exposed in my private VPN.
Now you know one tool to create your encrypted cloud drive, where you can store files without worrying about the security and privacy – your data will be safe as long as your password and salt are secure. Moreover, you still have security that comes by default from your cloud storage provider.
You may ask: Isn’t it an exaggeration to encrypt everything? No, if you really need it. And the need should come from you, not from the data you want to hide. If you don’t feel comfortable storing things online, but you want to benefit from that, maybe end-to-end encryption is for you. Whatever your choice, remember about regular backups – and encrypt them.
Icons used in featured image: OneDrive logo, Padlock icon by Freepik from flaticon.com.
-
Having a maintenance-free solution when you’re wiring everything by yourself sounds like a wish, but it’s sometimes possible. I set a backup using restic some time ago, and it just works. But yes, better to be prepared that things like that need your attention from time to time. Remember also about Murphy’s Law – if it can stop working occasionally, it stops in the worst possible moment. But isn’t it true for all services at all? ↩︎
-
Working directly on remote encrypted storage is something I still test. However, I use different tools to synchronize files I often need. I’ve tried to use a remote photo library (not Photos app), but the performance wasn’t satisfying. ↩︎
Enjoyed this post?