Set up multi-container environment using Docker Compose
I remember this time when I discovered Vagrant. The magic behind this tool and the general idea of scaffolding the whole environment using single command was pretty genius. Moreover, I had programmed on Windows and thankfully I could get rid of the XAMP and any other Windows-oriented web server packages.
In my previous job, my boss showed me a tool called Docker. I instantaneously got the point of the concept behind it and I started exploring the big universe of the possibilities of use. In this article, I’m going to show the most common use-case for docker – a proposed local environment suited for PHP application development.
This article is devoted to the configuration rather than explanation what the Docker really is. I would like to show the actual use-case rather than showing my point of view – I’ll follow it in one of the next articles.
Requirements
If you want to follow this instruction, you have to install:
- Docker CE – docker engine
- Docker Compose – tool for orchestrating the multi-container environment
- PHP and Composer
If you don’t want to follow this article, don’t worry. Everything is prepared and ready to use – just see my GitHub repository skrajewski/php-app-on-docker on a tag basic-php.
Test application
There is no much sense to create an advanced environment to develop a single-file script. To approach ourselves to the actual situation we’re going to run a Symfony 4 application.
Our application should use PHP 7.2 and should be served by the nginx web server. Moreover, we need also a database to store our data, e.g. MariaDB.
Think about the infrastructural services
All these three services may be considered as infrastructural services. Each of them may live in a dedicated container – we don’t have to mix up the PHP with the web server.
This is our goal. Create a multi-container environment where services will be connected together if needed.
Install Symfony’s website skeleton
In this step, I assume that we have installed and configured PHP and Composer. Of course, we may start from the environment and subsequently run the whole set up within it. In this article, we’ll focus on putting the application into the new environment.
To install Symfony application, run below command
composer create-project symfony/website-skeleton application
Change the working directory to application and let’s go to the environment definition.
Development environment
We should prepare three different containers for each of our services. We don’t want to do it by hand. It’s the place where docker-compose come to the play. By preparing docker-compose.yml file we can describe how our environment should look like.
Create a docker-compose.yml with the below content
version: '3'

services:
    php-fpm:
        image: php:7.2-fpm
    nginx:
        image: nginx:1.11
    db:
        image: mariadb:10
However this config will create a three containers environment, there is a lot of missing configuration yet.
Make services accessible from the host
To reach each of this service we have to know their internal IPs. Unfortunately, they are dynamically assigned so it’s hard to simply prepare a host file. To mitigate this problem we can bind exposed ports to our host machine. Let’s do this!
version: '3'

services:
    php-fpm:
        image: php:7.2-fpm
    nginx:
        image: nginx:1.11
        ports:
            - "8080:80"
    db:
        image: mariadb:10
        ports:
            - "33060:3306"
The syntax is following: "${HOST_PORT}:{SERVICE_PORT}". Now, the web server should be accessible under localhost:8080 and the database under localhost:33060. We don’t need a direct access to php container.
Provide credentials to our database
In order to access our database, we need to set up a password at least for the root user. The documentation of MariaDB image on Docker Hub is pretty good and it shows how to do it using environment variables. Let’s change a docker-compose.yml configuration a little bit.
version:'3'

services:
    php-fpm:
        image: php:7.2-fpm
    nginx:
        image: nginx:1.11
        ports:
            - "8080:80"
    db:
        image: mariadb:10
        ports:
            - "33060:3306"
        environment:
            - MYSQL_ROOT_PASSWORD=root
            - MYSQL_DATABASE=app
Our database server will create a default database called app and set the root password’s to root. Not so secure, but it’s enough for the local development. Keep it simple.
Add a virtual host to nginx container
However nginx is working correctly, it shows nothing interesting than the standard welcome page. We have to add the configuration to let web server knows how to manage request to our application.
Personally, I like to keep all docker related stuff in the directory called .docker which I create in the root of the project. For a better order, I’m going to add subdirectory related to the service to keep all files together.
mkdir -p .docker/nginx
touch .docker/nginx/default.conf
Put the virtual host configuration to the newly created default.conf file.
server {
    # This is the root of our application, we need to mount files in /app
    root /app/public;
    index index.php index.html;
    server_name _;

    location / {
        try_files $uri /index.php$is_args$args;
    }

    location = /favicon.ico {
        log_not_found off;
        access_log off;
    }

    location = /robots.txt {
        allow all;
        log_not_found off;
        access_log off;
    }

    location ~ ^/index\.php(/|$) {
        # Instead of using socket, we pass execution of PHP files
        # to the process on different container using host name
        fastcgi_pass php-fpm:9000;
        fastcgi_split_path_info ^(.+\.php)(/.*)$;
        include fastcgi_params;
        fastcgi_param SCRIPT_FILENAME $realpath_root$fastcgi_script_name;
        fastcgi_param DOCUMENT_ROOT $realpath_root;
        internal;
    }

    location ~* \.(js|css|png|jpg|jpeg|gif|ico)$ {
        expires max;
        log_not_found off;
    }

    location ~ \.php$ {
        return 404;
    }

    error_log /var/log/nginx/project_error.log;
    access_log /var/log/nginx/project_access.log;
}
As we can see in the configuration file, we use a php-fpm located in another container. This approach allows us to e.g. change the PHP version without changes in the web-server.
To make it works, we need to mount both configuration and application files into the nginx container.
version: '3'

services:
    php-fpm:
        image: php:7.2-fpm
    nginx:
        image: nginx:1.11
        ports:
            - "8080:80"
        volumes:
            - ./:/app
            - ./.docker/nginx/default.conf:/etc/nginx/conf.d/default.conf:ro
    db:
        image: mariadb:10
        ports:
            - "33060:3306"
        environment:
            - MYSQL_ROOT_PASSWORD=root
            - MYSQL_DATABASE=app
Mount the application to the PHP container
In spite of the nginx has access to the application files, the php-fpm container doesn’t know anything about the files. The php-fpm should also have access to application files in order to process them on the request of web-server. Let’s mount the application directory also to this container.
version: '3'

services:
    php-fpm:
        image: php:7.2-fpm
        volumes:
            - ./:/app
    nginx:
        image: nginx:1.11
        ports:
            - "8080:80"
        volumes:
            - ./:/app
            - ./.docker/nginx/default.conf:/etc/nginx/conf.d/default.conf:ro
    db:
        image: mariadb:10
        ports:
            - "33060:3306"
        environment:
            - MYSQL_ROOT_PASSWORD=root
            - MYSQL_DATABASE=app
In the old good days, docker-compose in version ‘2’ has option volumes_from which allows mounting volumes from the other container. It let us avoiding repetition but unfortunately, for various reasons, this option is no longer supported.
Use our own PHP configuration and extensions
Using the raw PHP image is very limited. The better option is to create own image using the PHP image as a foundation. We can do this by creating a new Dockerfile.
Similar to nginx configuration, let’s put the new file in .docker/php/Dockerfile.
mkdir -p .docker/php
touch .docker/php/Dockerfile
Now, edit newly created Dockerfile and put below content.
FROM php:7.2-fpm

RUN apt-get update && apt-get install -y \
    libmcrypt-dev \
    zlib1g-dev \
    libicu-dev \
    g++

RUN docker-php-ext-install -j$(nproc) iconv mysqli pdo_mysql mbstring intl

RUN yes | pecl install xdebug-2.6.1 mcrypt-1.0.1 \
    && docker-php-ext-enable xdebug mcrypt
Based on php:7.2-fpm we create a new image with some extra extensions, which are needed for our application. If you need more information about the php image, please check the documentation on the Docker Hub. The same thing we may do with the php.ini file, but we skip it for the sake of brevity.
The only thing to do is to use this image in our docker-compose.yml file. Let’s do it.
version: '3'

services:
    php-fpm:
        build:
            context: .
            dockerfile: .docker/php/Dockerfile
        volumes:
            - ./:/app
    nginx:
        image: nginx:1.11
        ports:
            - "8080:80"
        volumes:
            - ./:/app
            - ./.docker/nginx/default.conf:/etc/nginx/conf.d/default.conf:ro
    db:
        image: mariadb:10
        ports:
            - "33060:3306"
        environment:
            - MYSQL_ROOT_PASSWORD=root
            - MYSQL_DATABASE=app
Configure the application
The application will be running from the container so it may use internal hostnames. For example, to configure a database connection, open your .env file and change the DATABASE_URL to following:
DATABASE_URL=mysql://root:root@db:3306/app
Because we don’t run any extra services right now, this is the only change in the application.
Initialize the environment
To initialize the whole environment, use a docker-compose tool.
docker-compose up -d
It may take a while since the docker has to build a custom php image. After a few minutes, everything should be done and the application should be accessible under the localhost:8080 url.
The up command is for scaffolding the whole environment. For the normal usage, you should use start/stop commands.
Final result
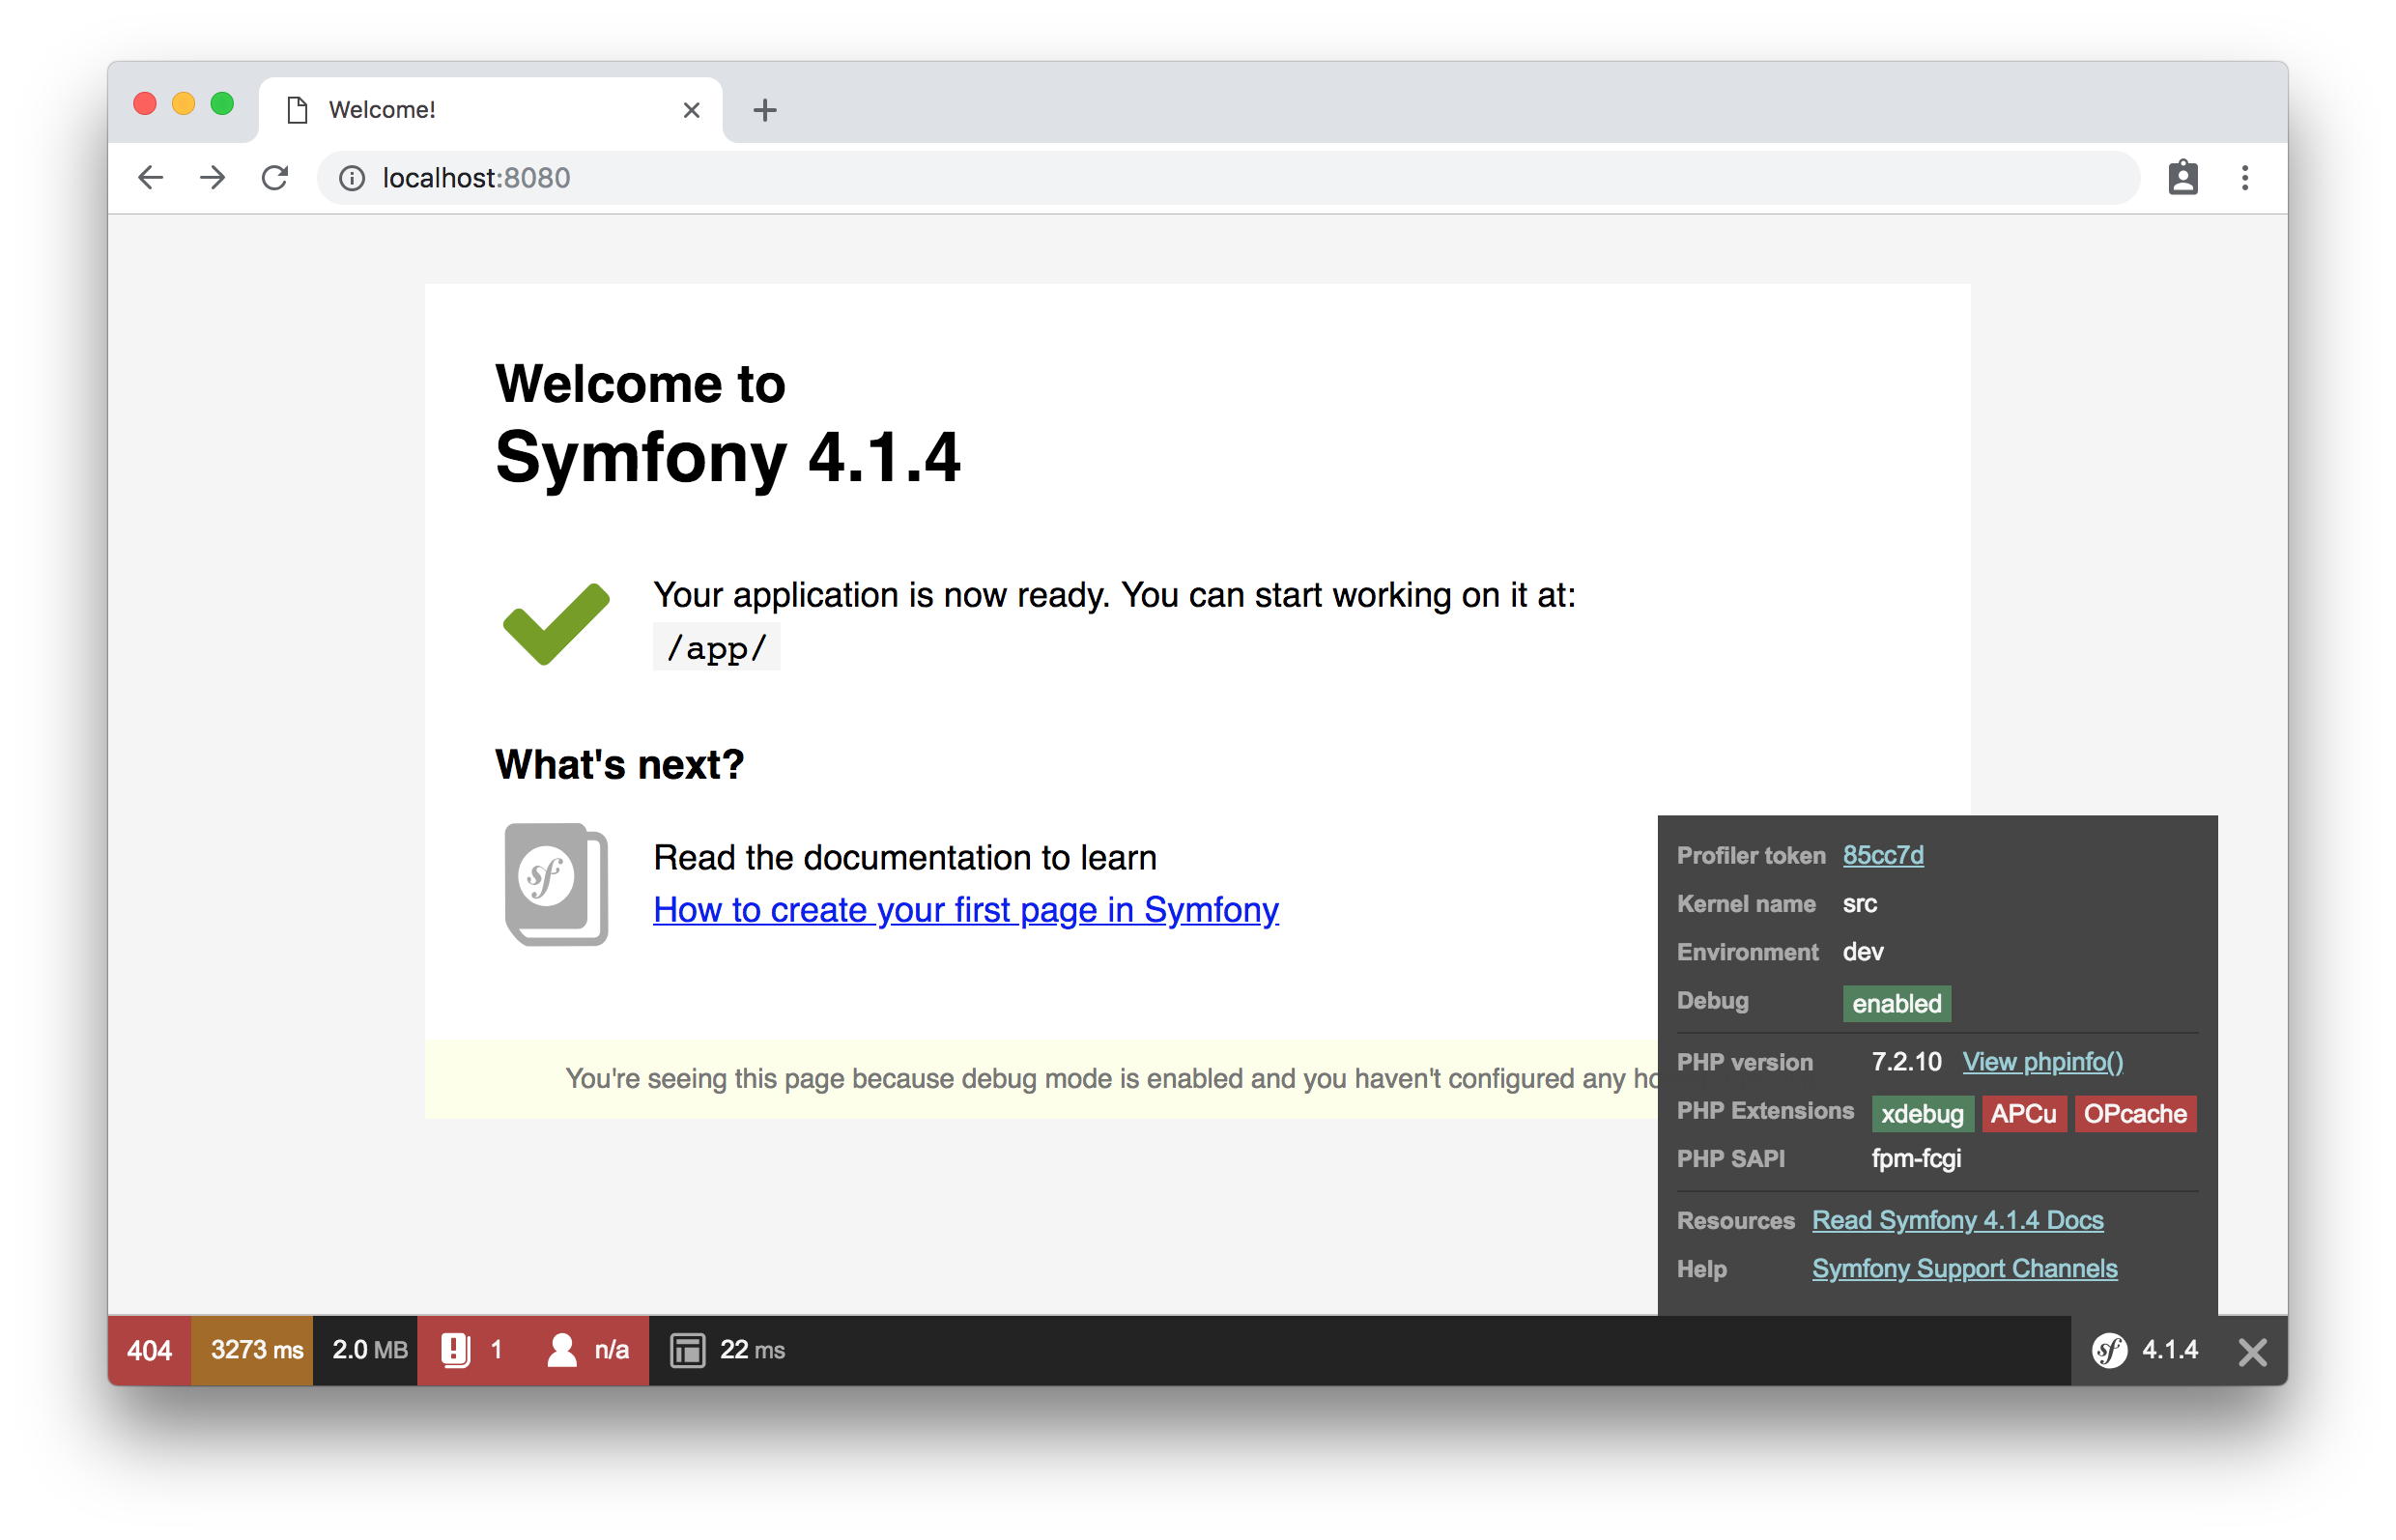
If you try to reach the localhost:8080, you should see the page similar to the following.

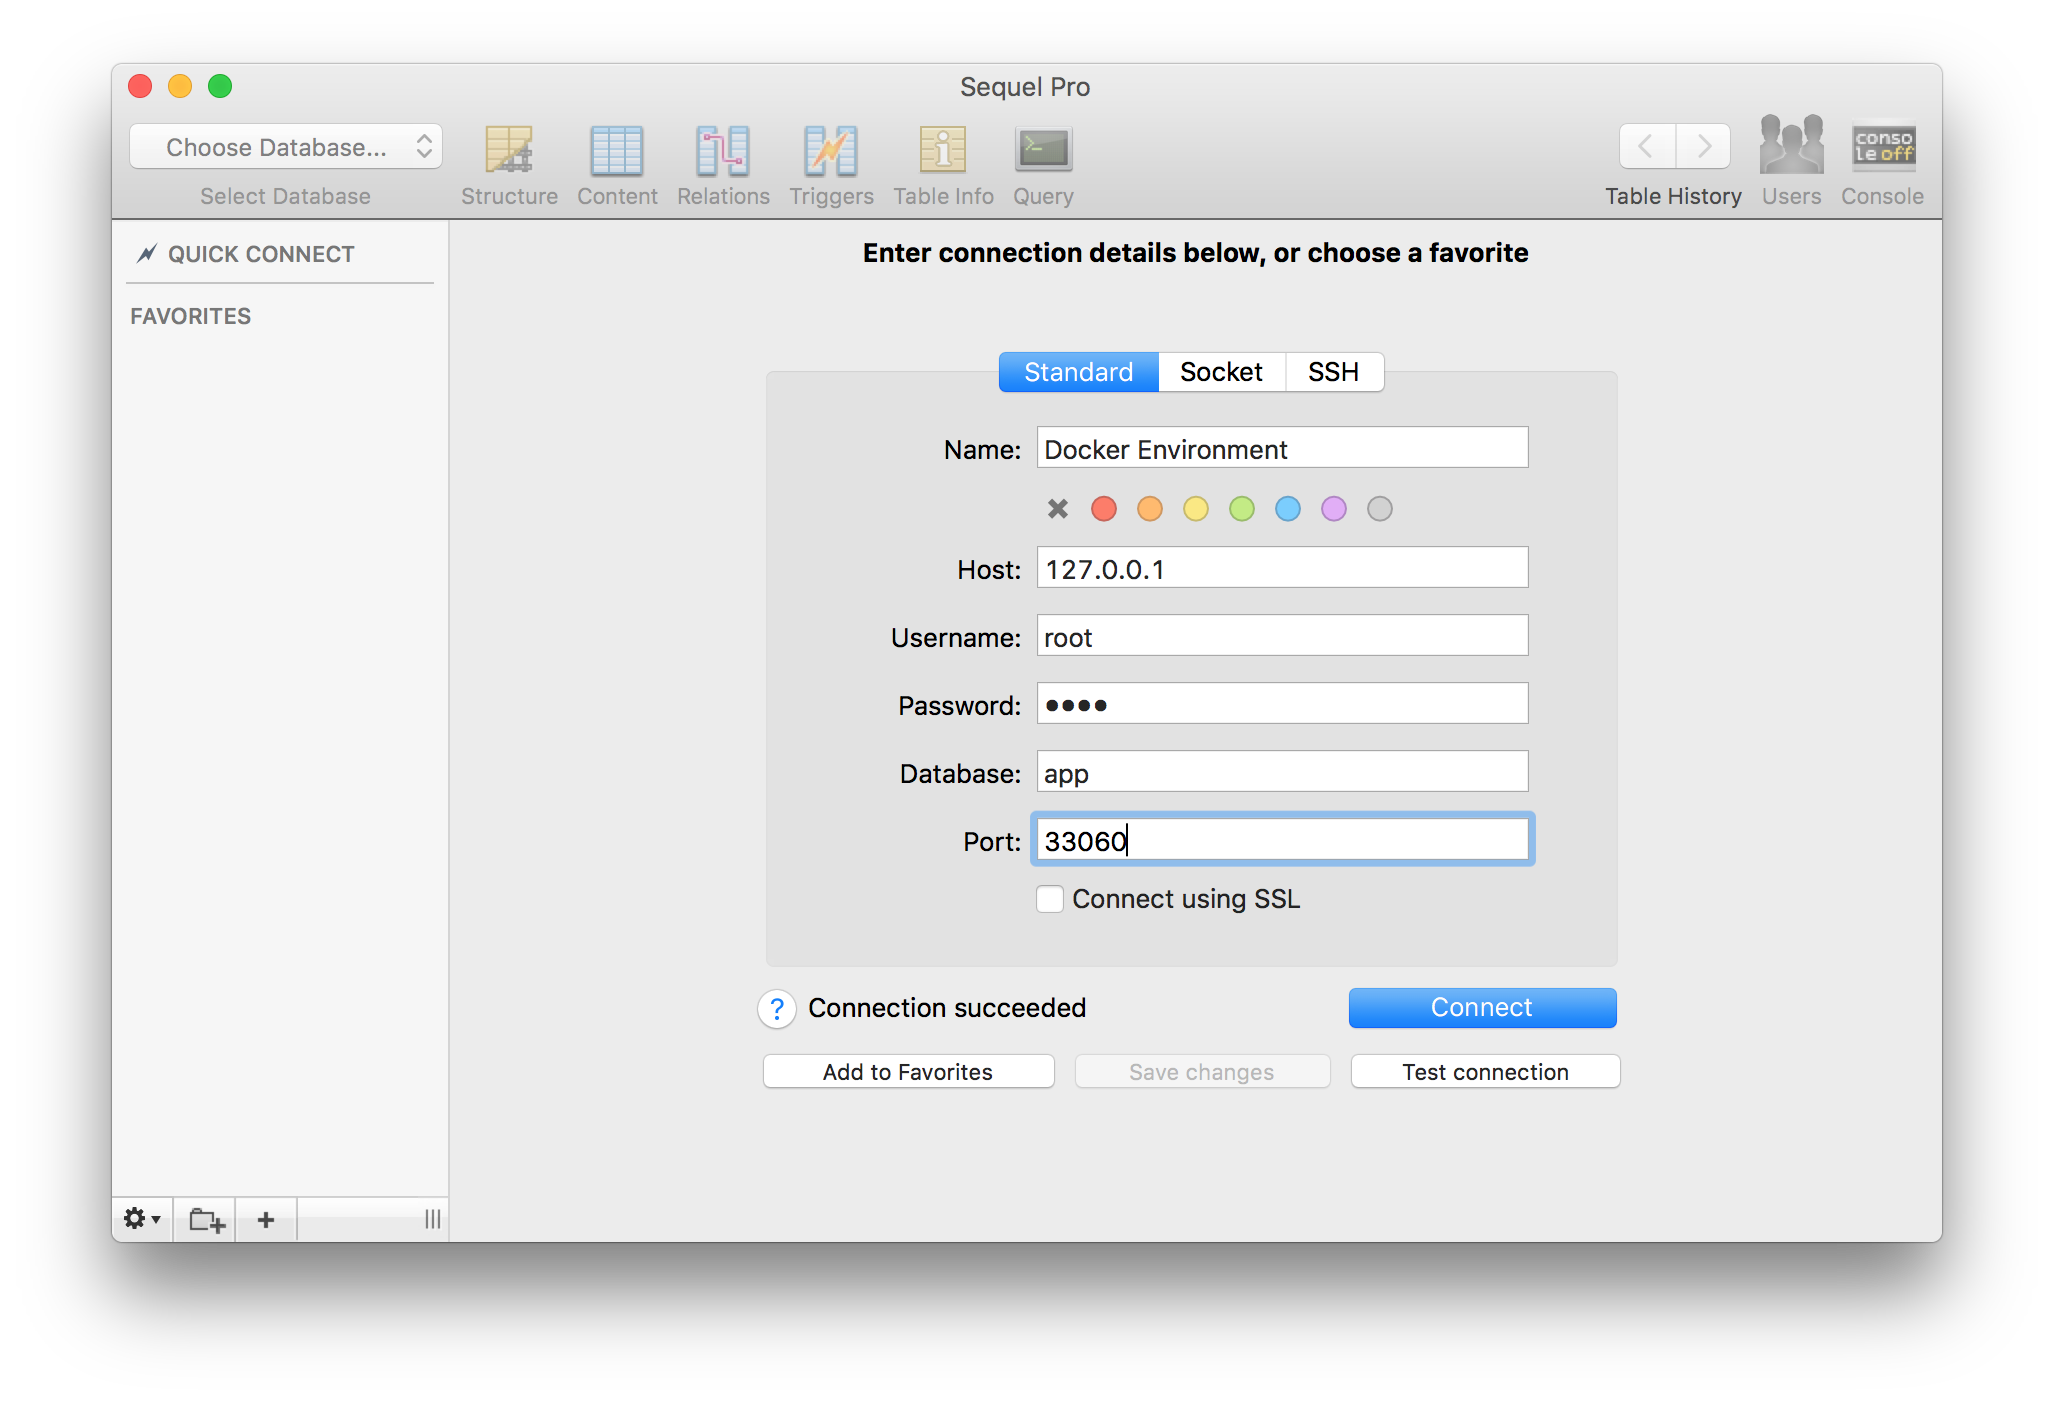
To connect easily to the database server outside the environment, you may use the localhost host and the port 33060. For instance, the below screen presents connection details in a Sequel Pro application.

Summary
We successfully went through the first part of the environment preparation and configuration. This is the very beginning part of the whole journey. Each environment should be suited for the application it hosts. Maybe you’ll use a different database engine, a different cache storage or a queue solution. The configuration should depend on the needs.
Is it worth to create a universal environment? It depends on how universal it should be. If you want to develop applications in only one framework or one technology, why now. If you would like to create a versatile environment for a bigger spectrum of technologies, it may not make much sense.
That’s the reason why I didn’t write the final configuration with a paragraph of text describing how to use it. Instead, I tried to show you how to set up an environment you really need. I have taken each action as the response for a need.
Preparing the environment is different than the programming, but also makes fun. It’s worth to know what you use it, how, and even why. Stay tuned.
Featured photo by chuttersnap on Unsplash